Exercises For Sciatica and Lower Back Pain
If you are a busy lady, who spend much time working at her computer or doing some other type of sitting job, or vice versa, if you spend too much time walking during the day, you might have some problems with your back. Do you often feel pain in back at the end of the day?
This exercises will help you to forget about it. Check them out. Clamshells, Supta Virasana, Birddog, Savasana, Cat Pose, Camel Pose, Bow Pose, Standing Forward Bend. If you will do this exercises regularly you will be able to get rid of sciatica as well. It means that you won’t suffers from weakness and tingling in your muscles.
If your nerves are clamped, these exercises will help them to place themselves back in a place where they are supposed to be. You will be more energetic with the help of these exercises. So, don’t be hesitant to try them out and leave your comments afterwards.
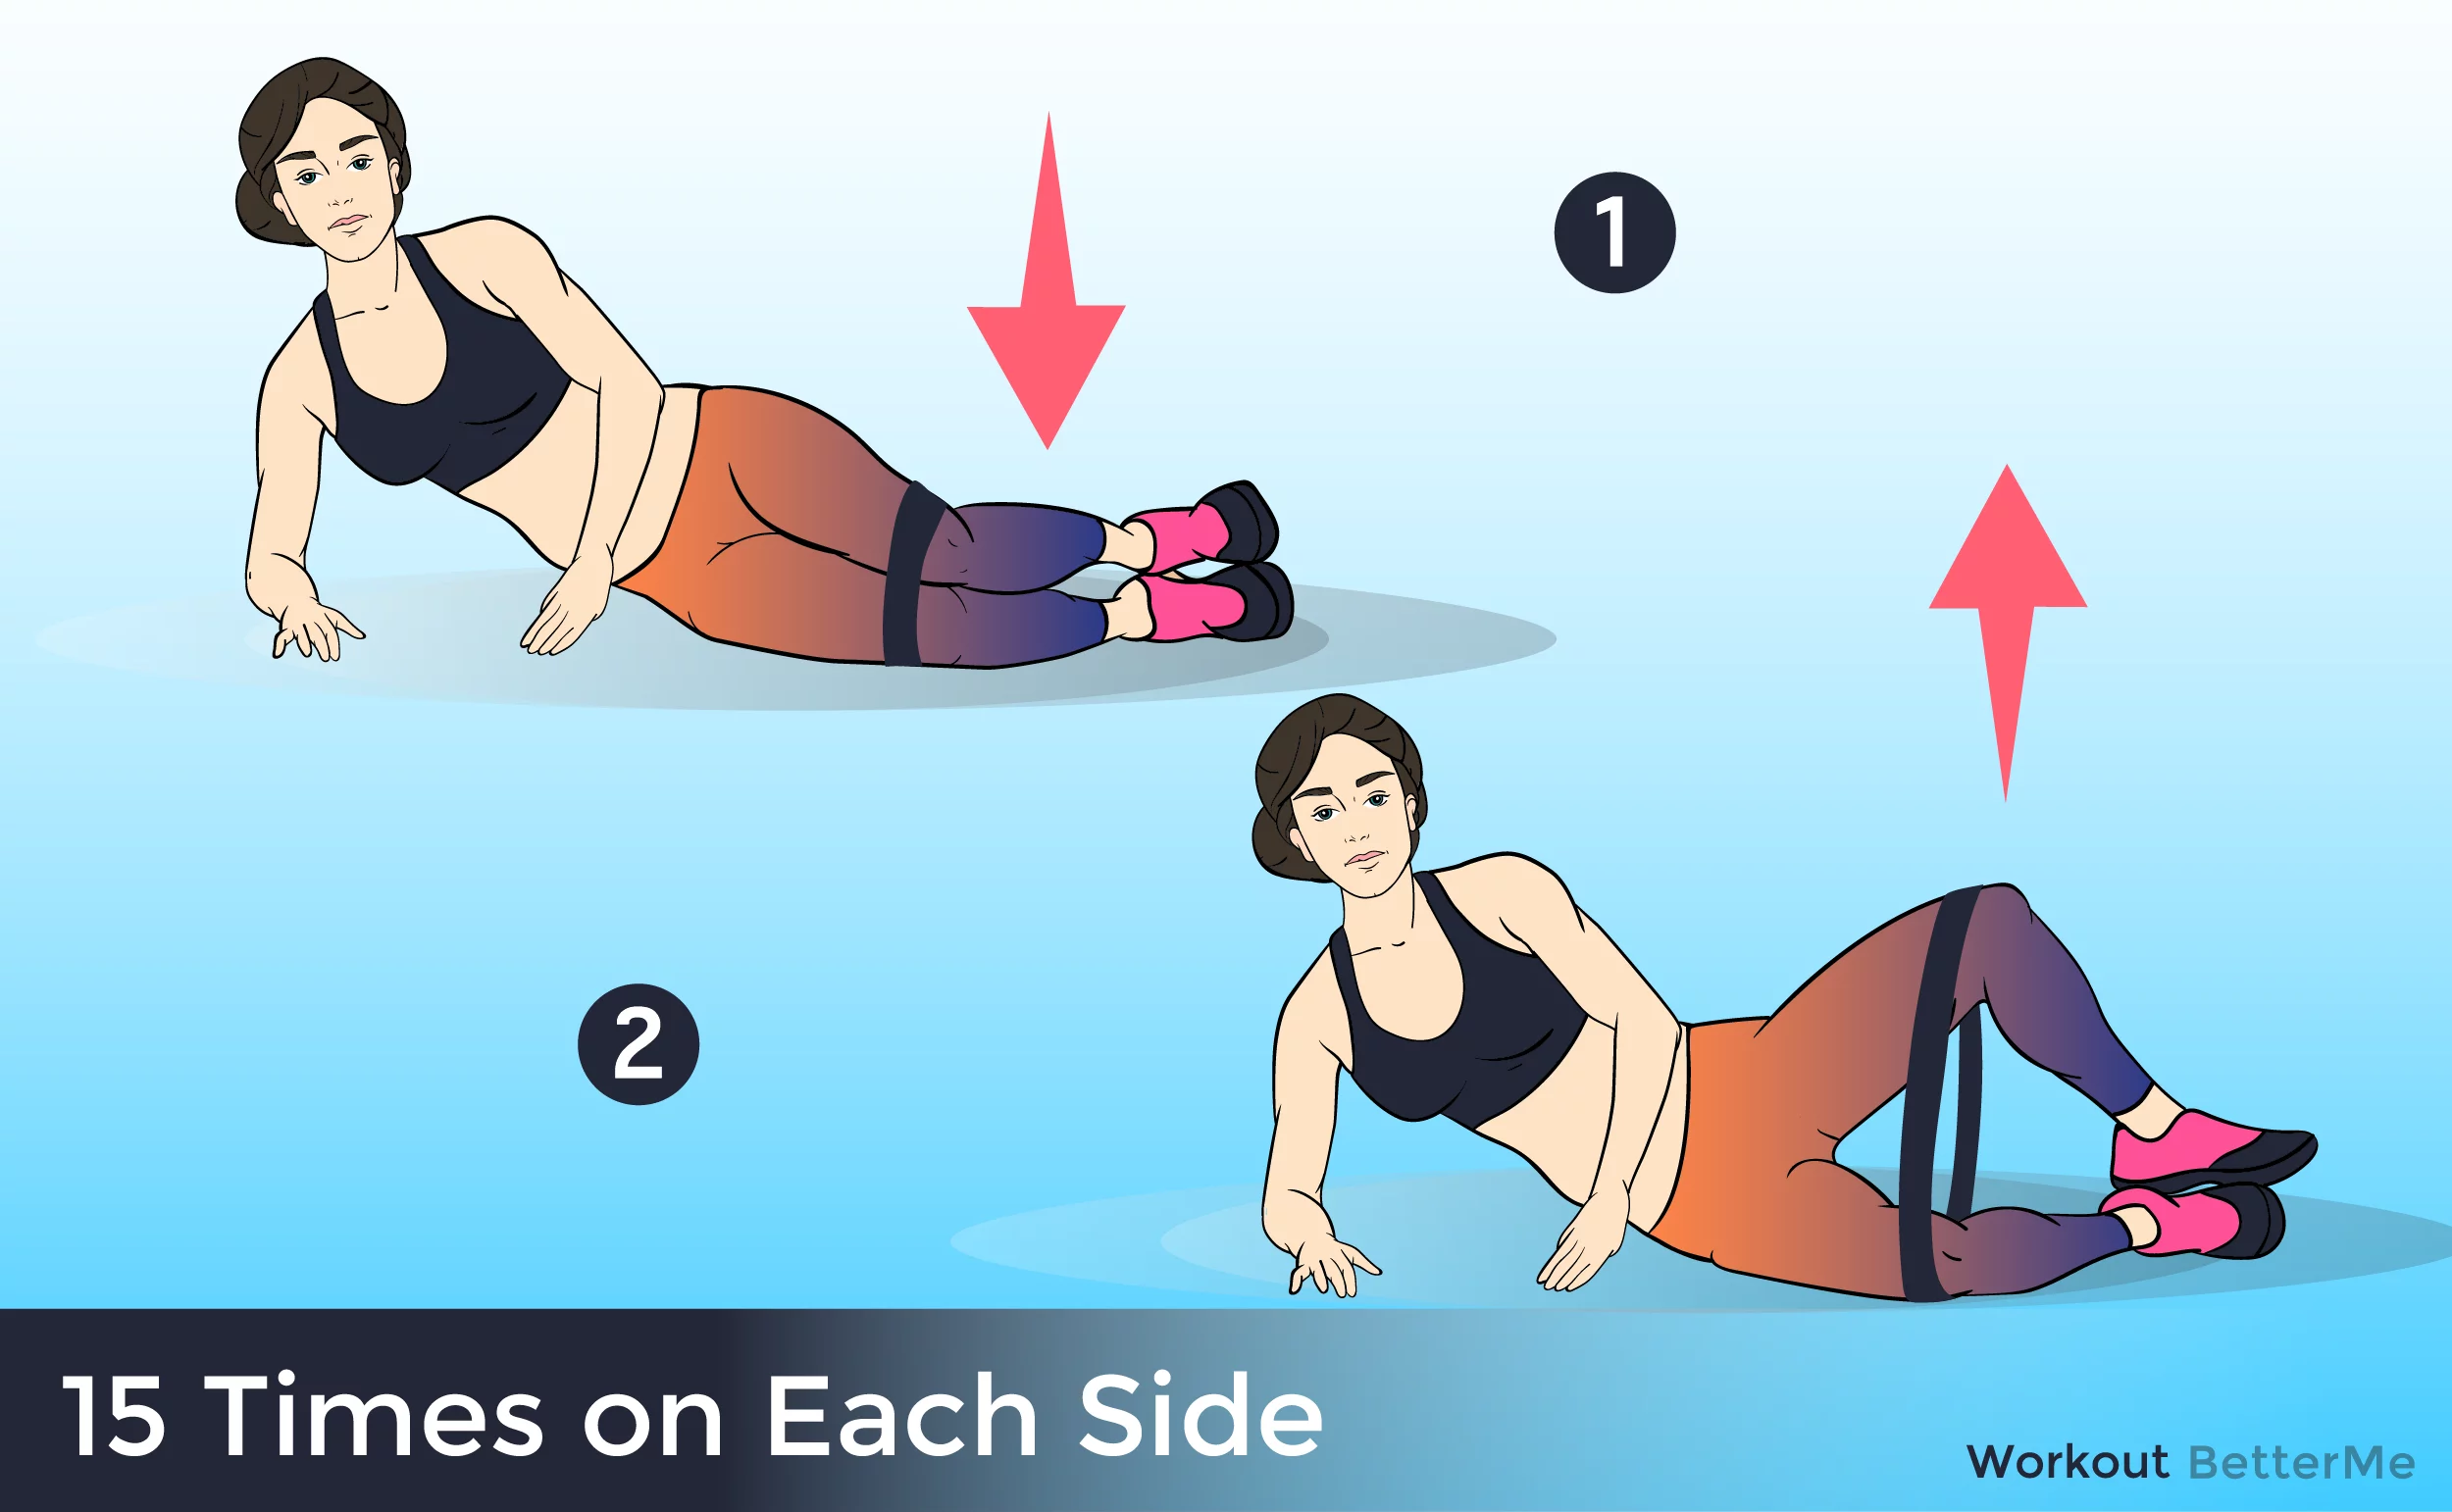
#1. Clamshells
Credit: BetterMe
– On a mat or comfortable surface, lie on your left side. Place your left hand behind your head while placing your right hand across your body.
– Bend your stacked knees so that your feet are behind you. Begin the movement by lifting the left knee up while keeping the feet together.
– Pause at the top of the movement and slowly lower your left knee down to the starting position.
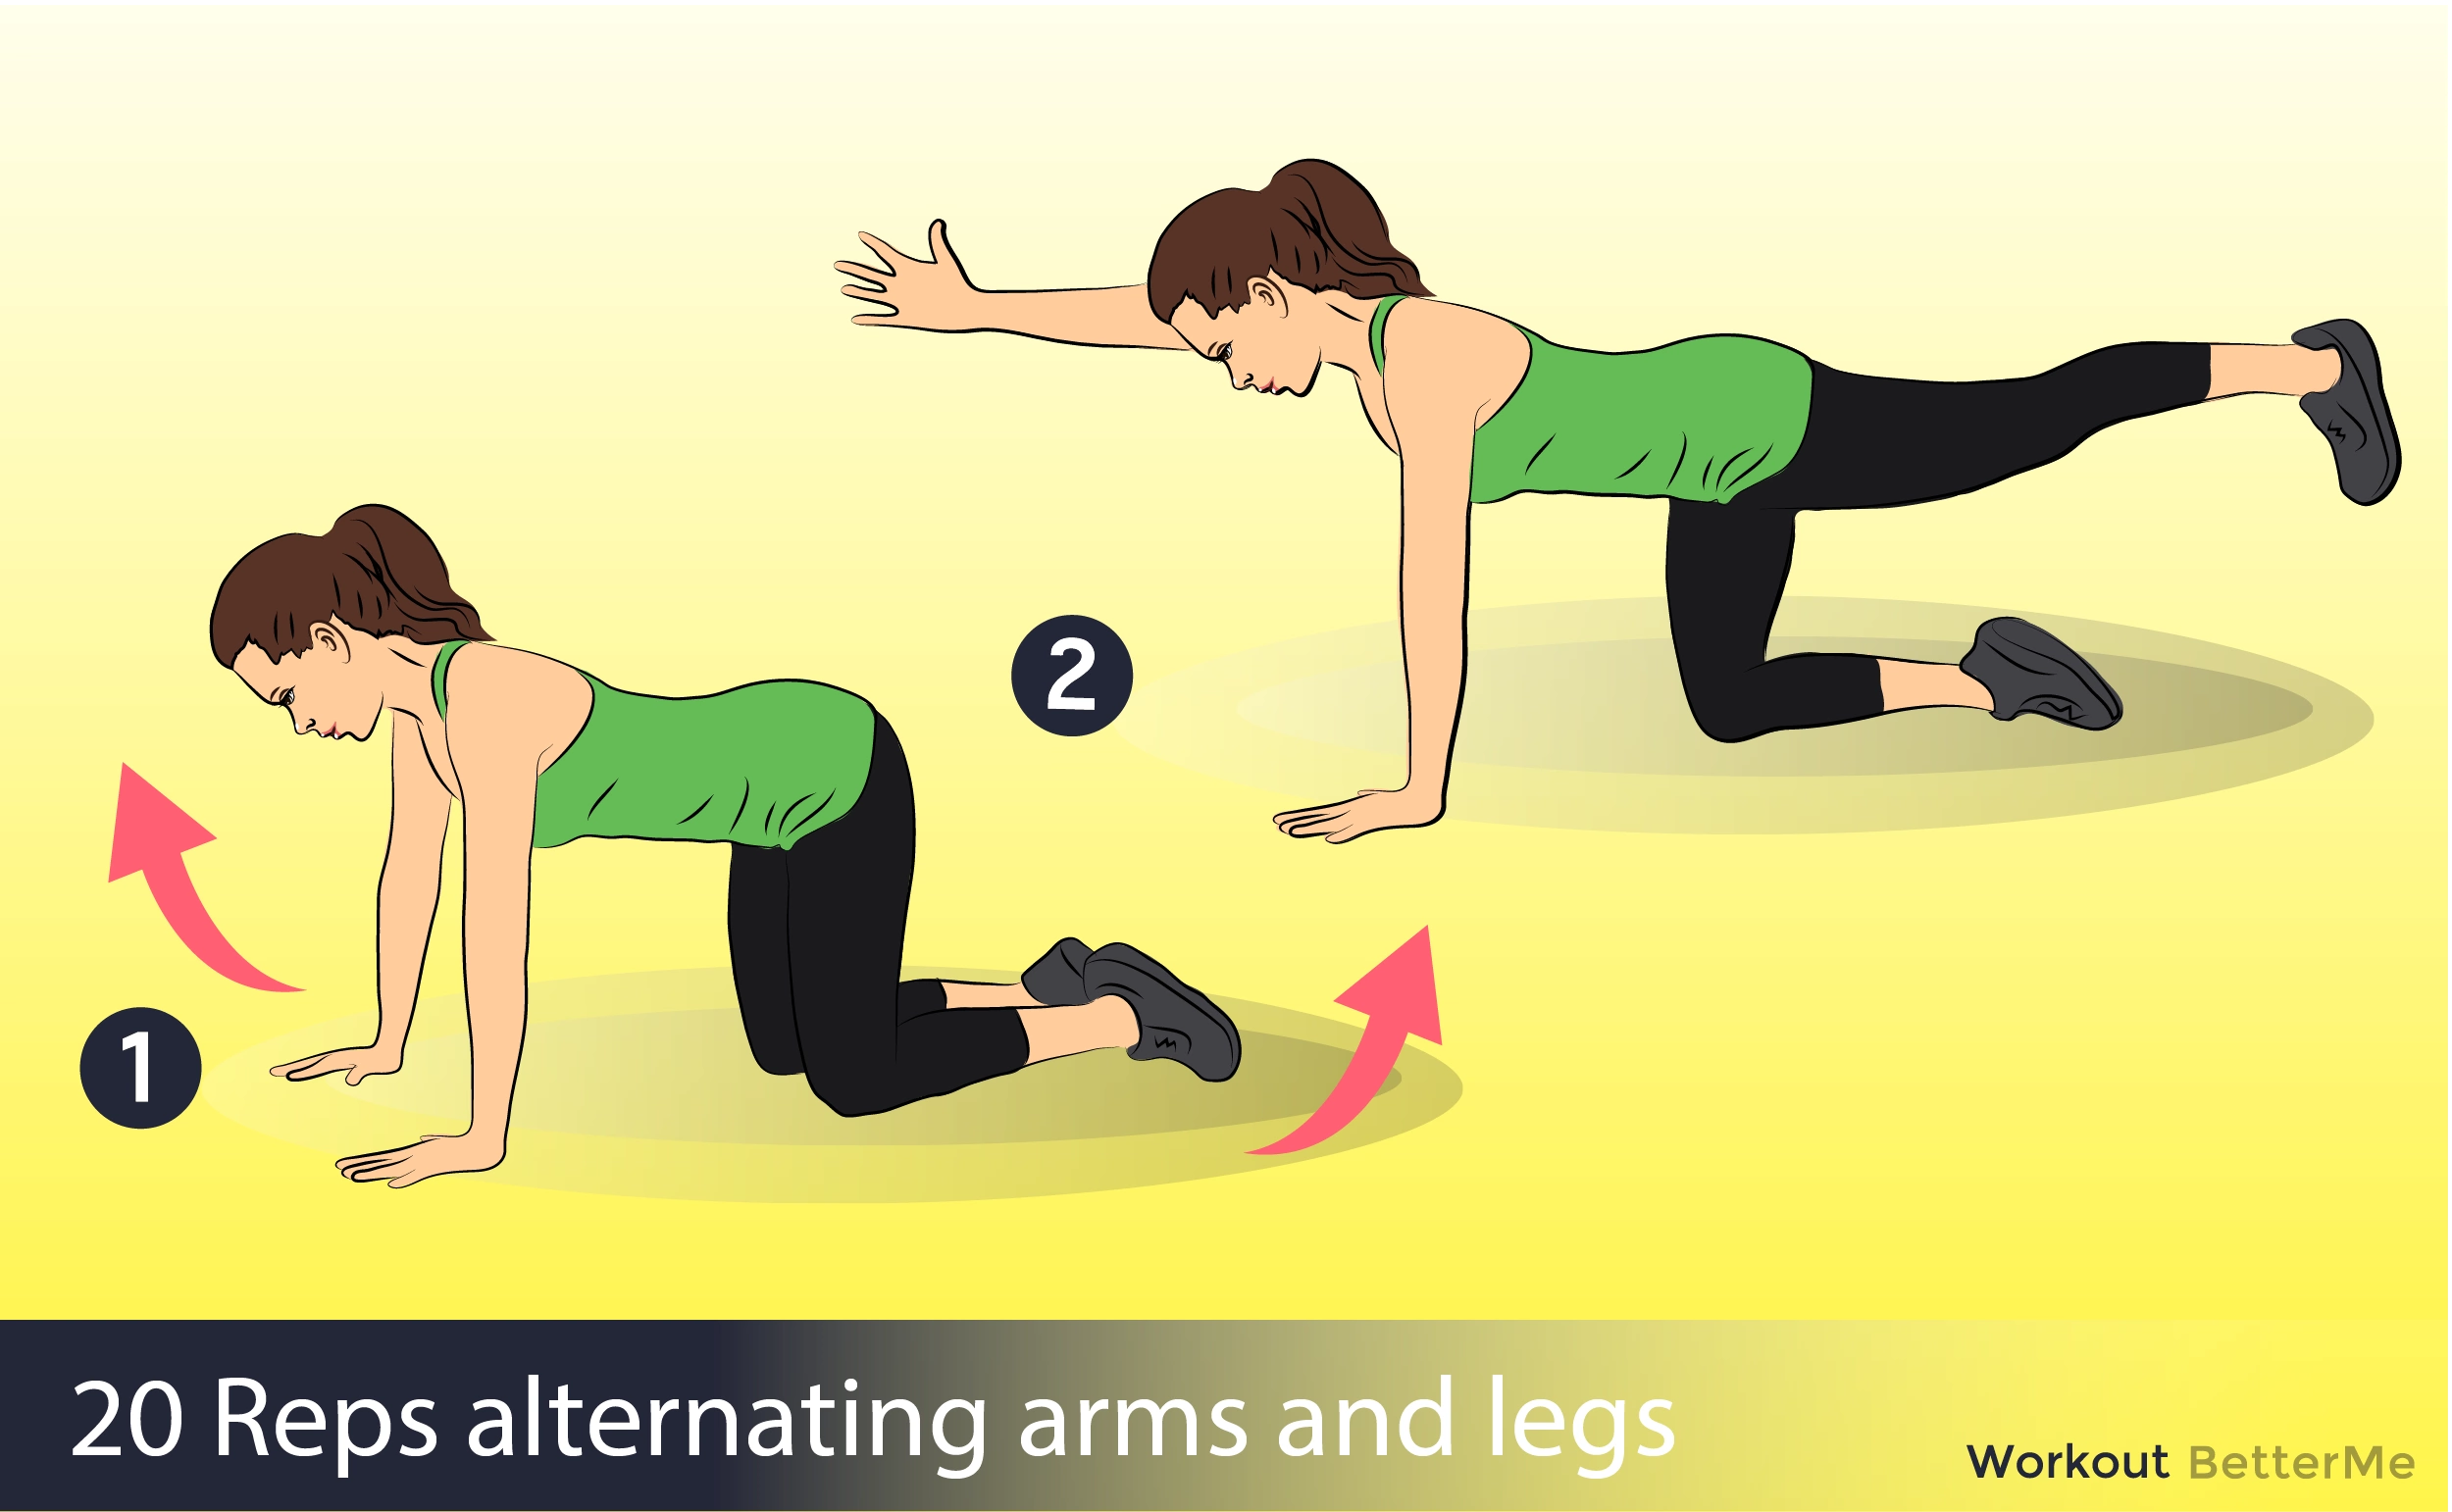
#2. Bird Dogs
Credit: BetterMe
– Position yourself on all fours with knees underneath the hips and wrists under the shoulders. Engage your abs and keep your spine neutral, pulling the shoulder blades towards the hips.
– Lengthen the left leg until it is straight out and in line with your hips while simultaneously raising and straightening your right arm until it is parallel to the floor. Keep your head and shoulders aligned at all times.
– Gently lower your arm and leg back to the starting position and alternate with the other arm and leg.
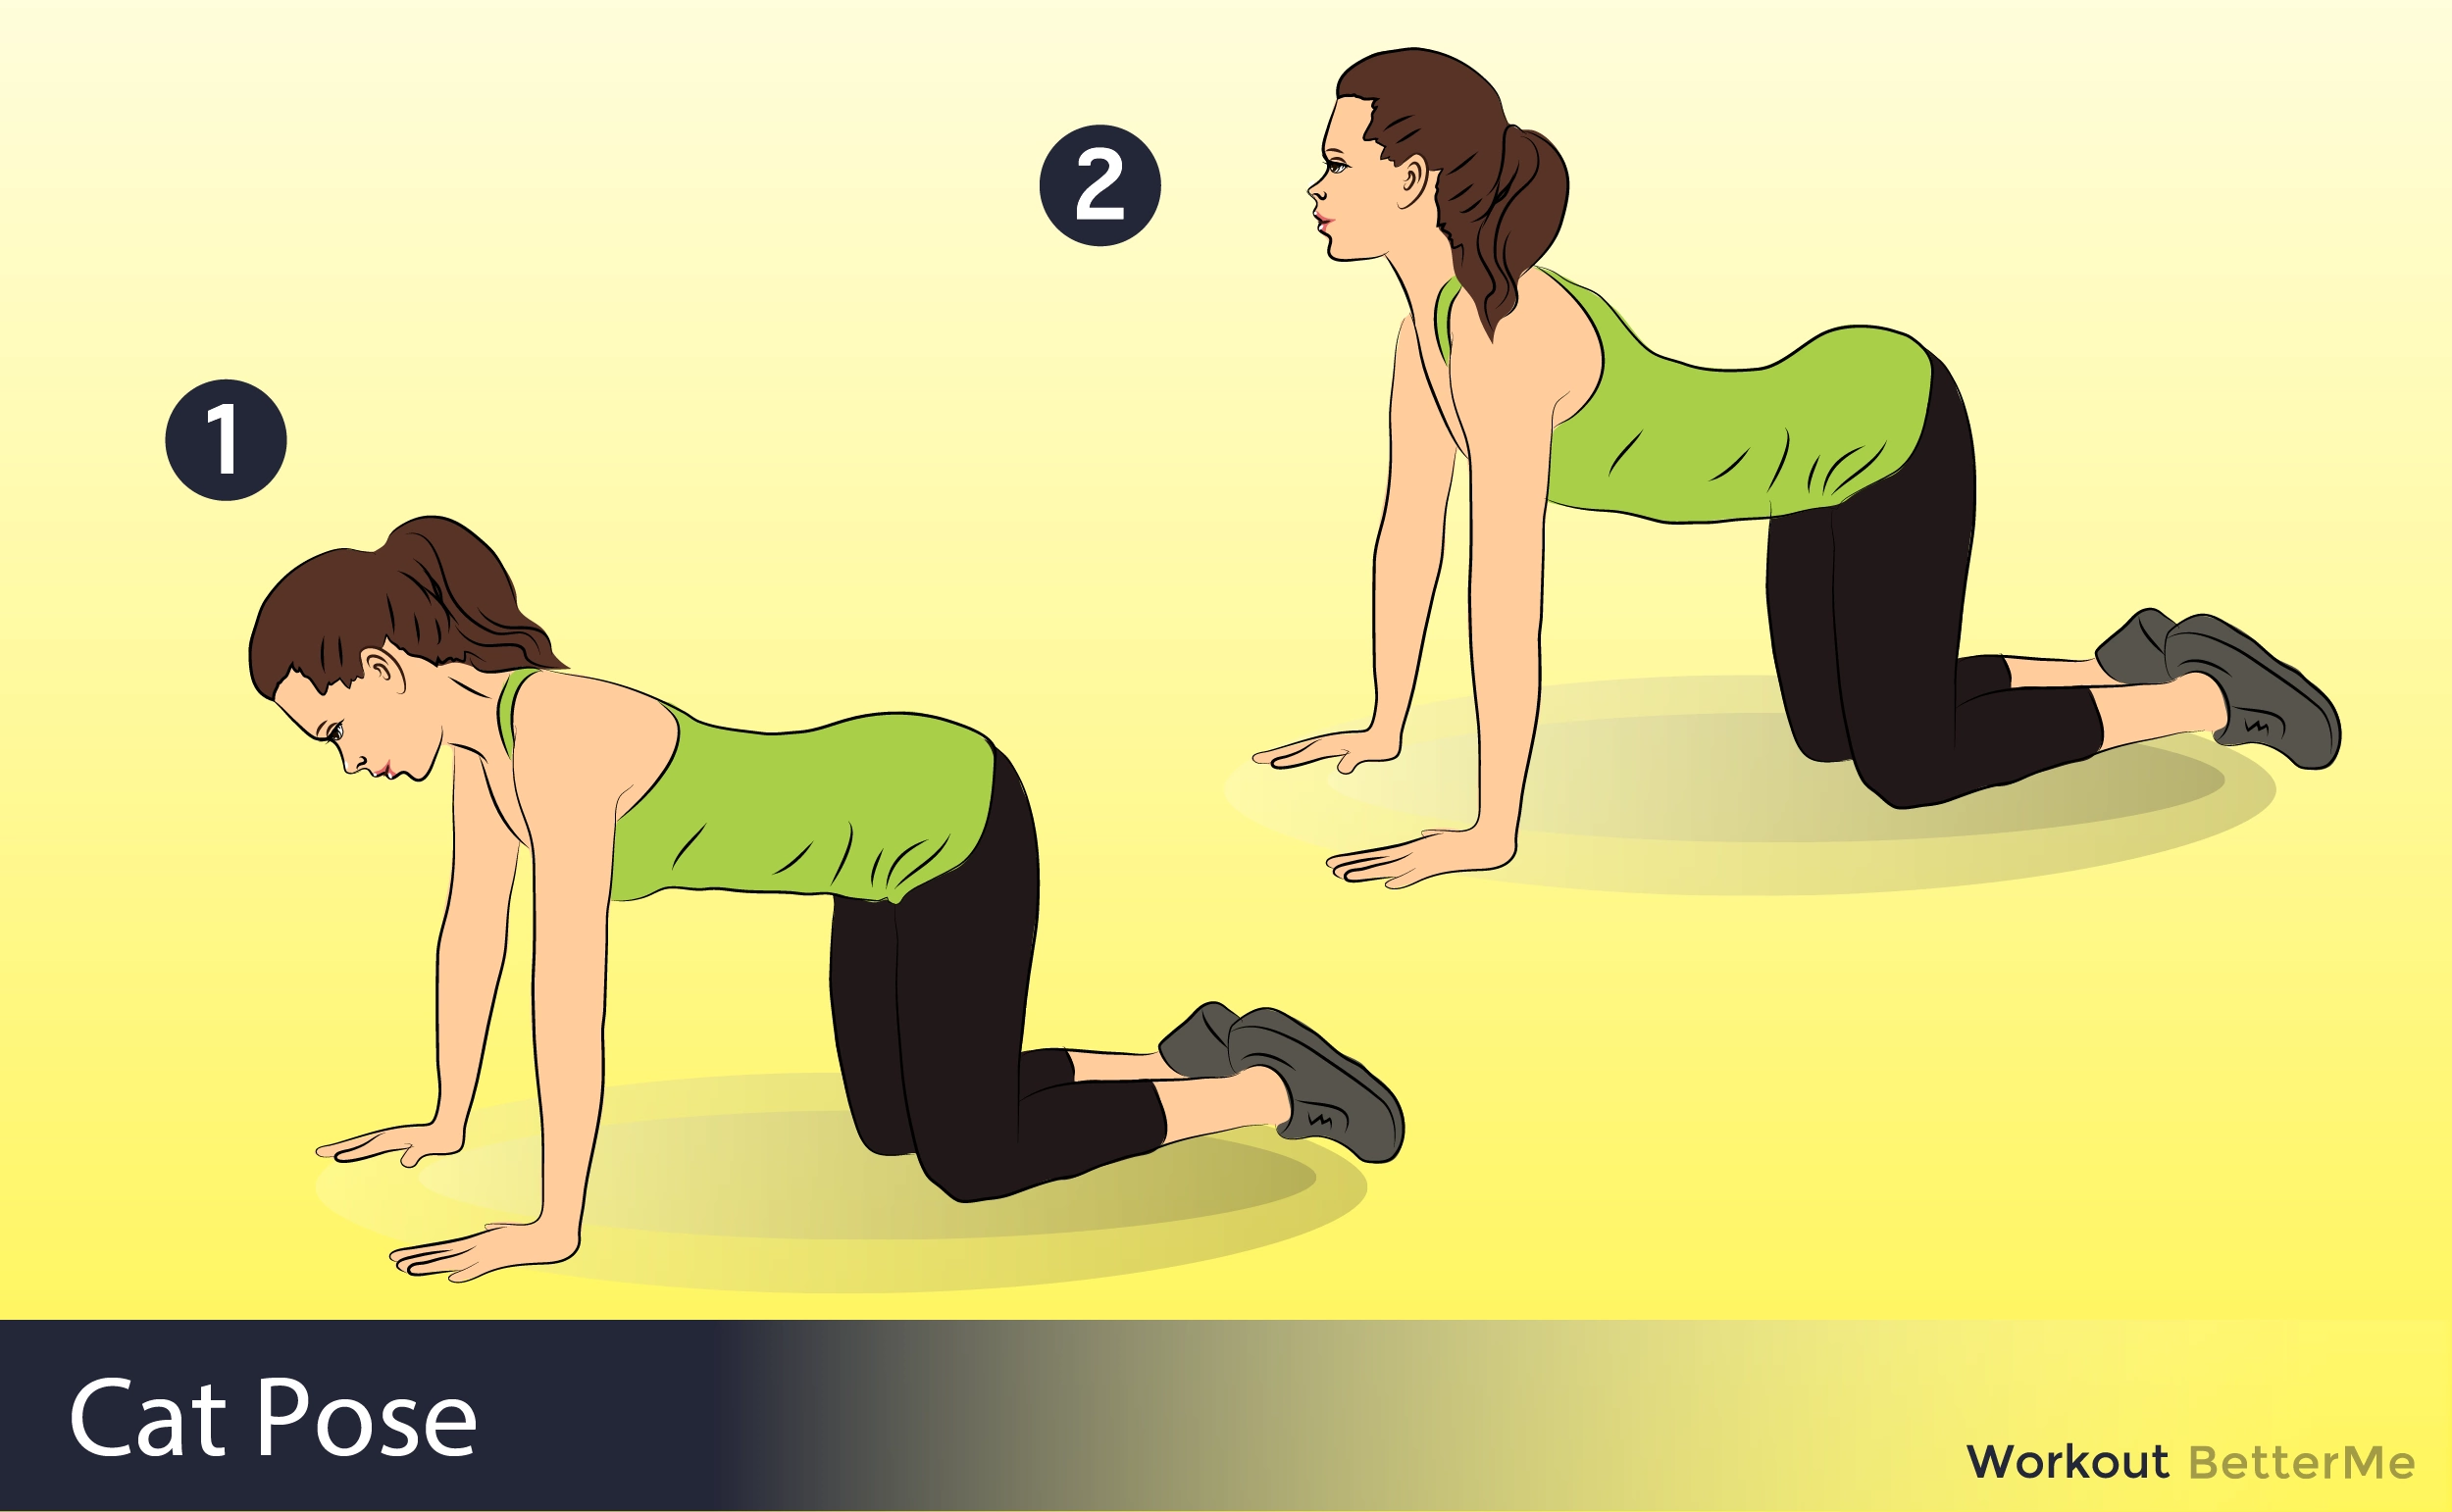
#3. Cat Pose
Credit: BetterMe
– From Box (Cakravākāsana), shift some weight to the palms. The wrists, elbows and shoulders are in one line. The abdomen is pulled in and up with the spine arched in a strong Cobra spine.
– The crown of the head is towards the earth and the neck is relaxed. The gaze is between the arms towards the belly.
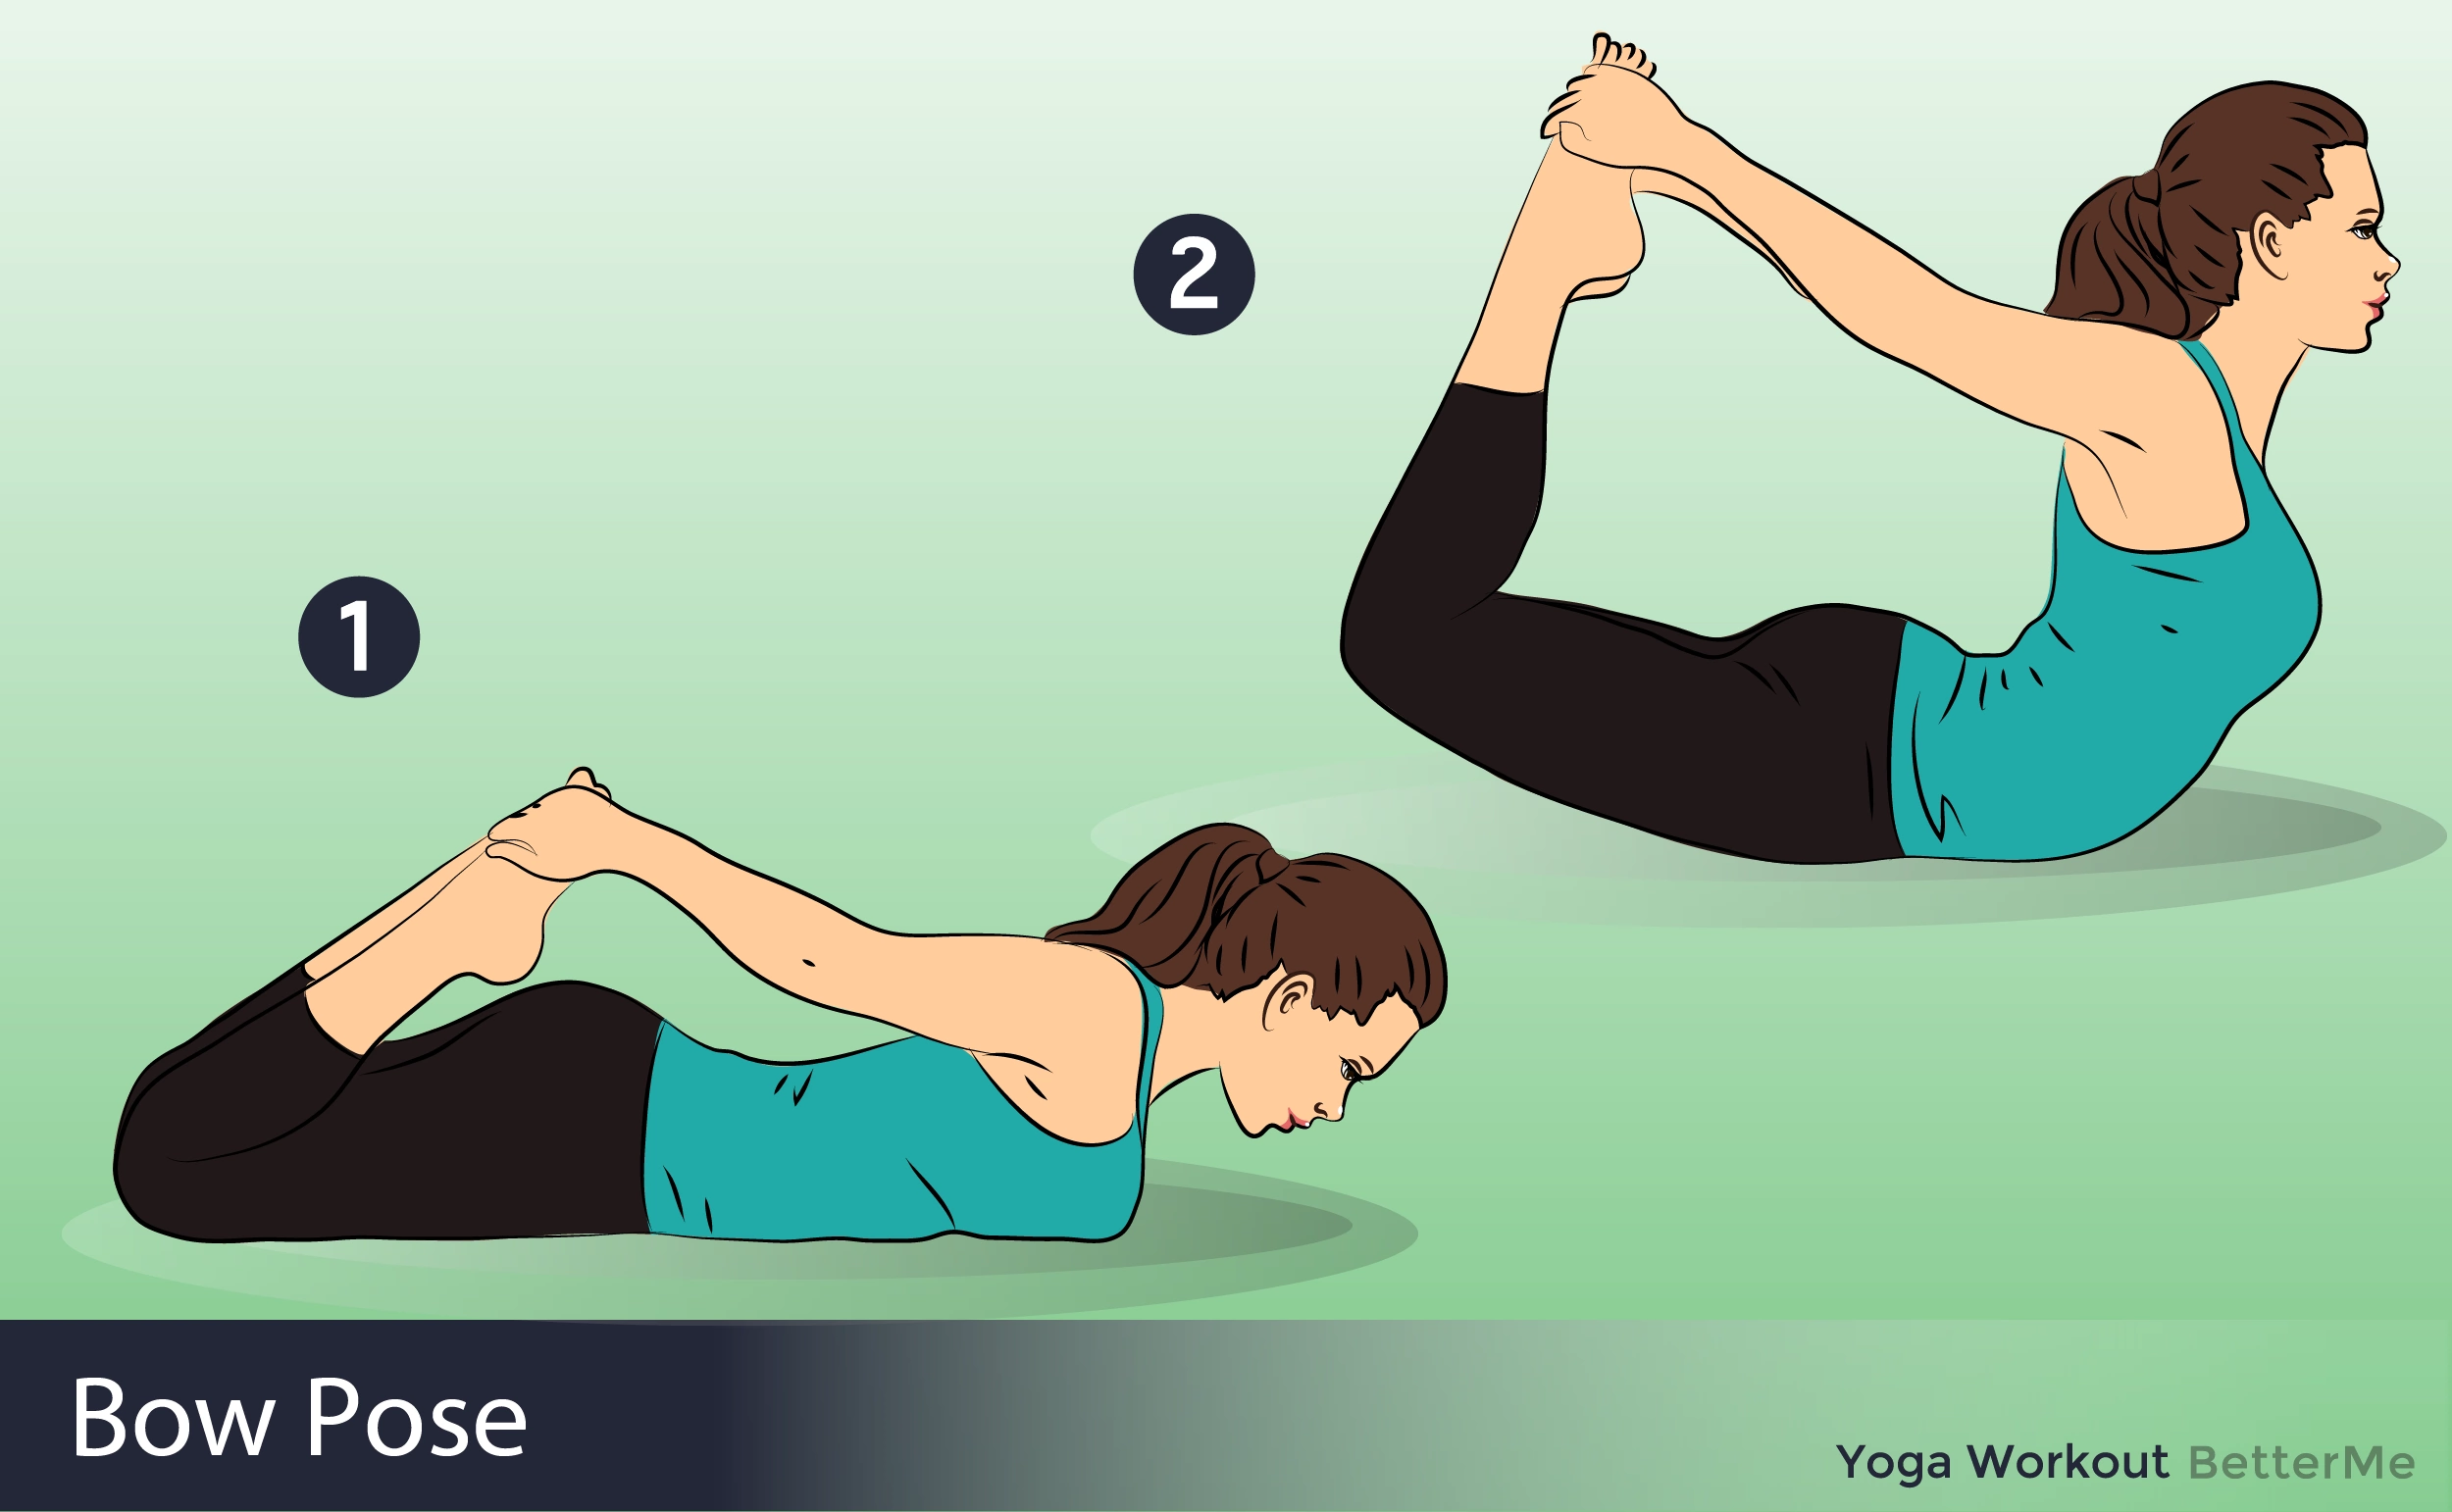
#4. Bow Pose
Credit: BetterMe
– From a prone position with the abdomen on the earth, the hands grip the ankles (but not the tops of the feet) with knees no wider than the width of your hips.
– The heels are lifted away from the buttocks and at the same time the thighs are lifted away from the earth working opposing forces as the heart center, hips and back open. The gaze is forward.
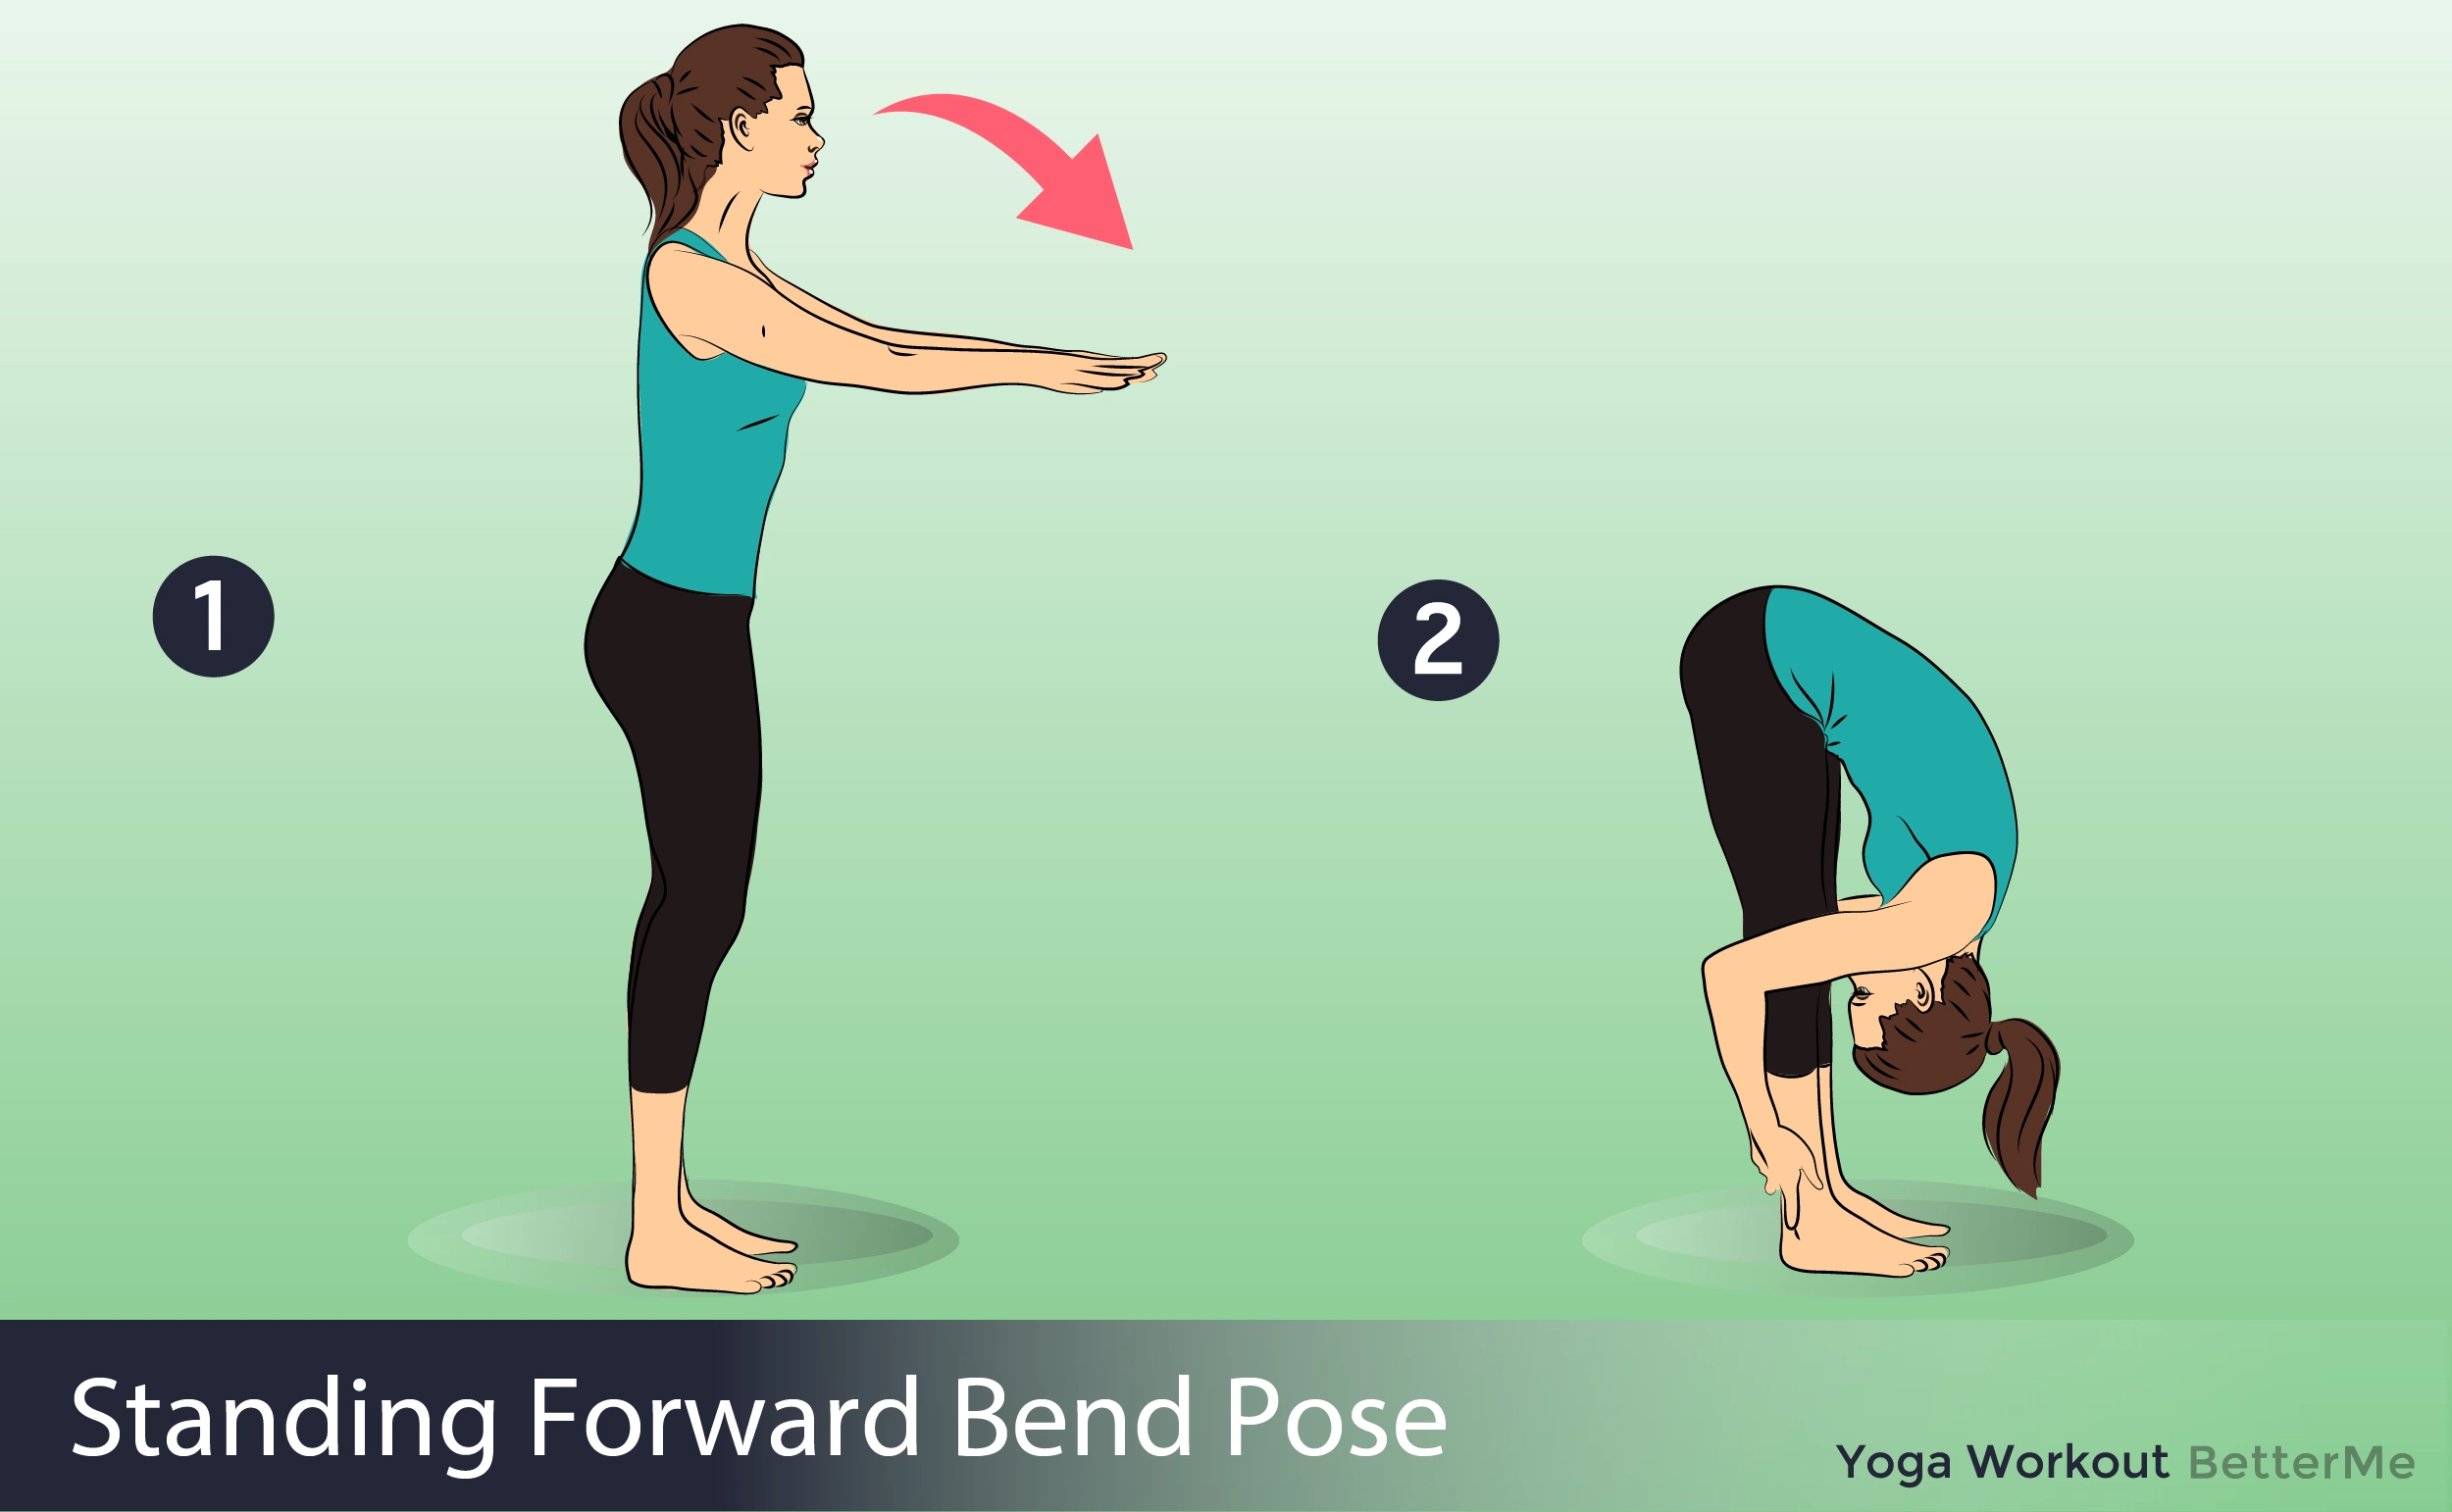
#5. Standing Forward Bend
Credit: BetterMe
– From a standing position, the body is folded over at the crease of the hip with the spine long. The neck is relaxed and the crown of the head is towards the earth. The feet are rooted into the earth with the toes actively lifted.
– The spine is straight. The ribcage is lifted. The chest and the thighs are connected. The sacrum lifts up toward the sky in dog tilt.
– The fingertips are resting on the earth next to the toes. The gaze is down or slightly forward.
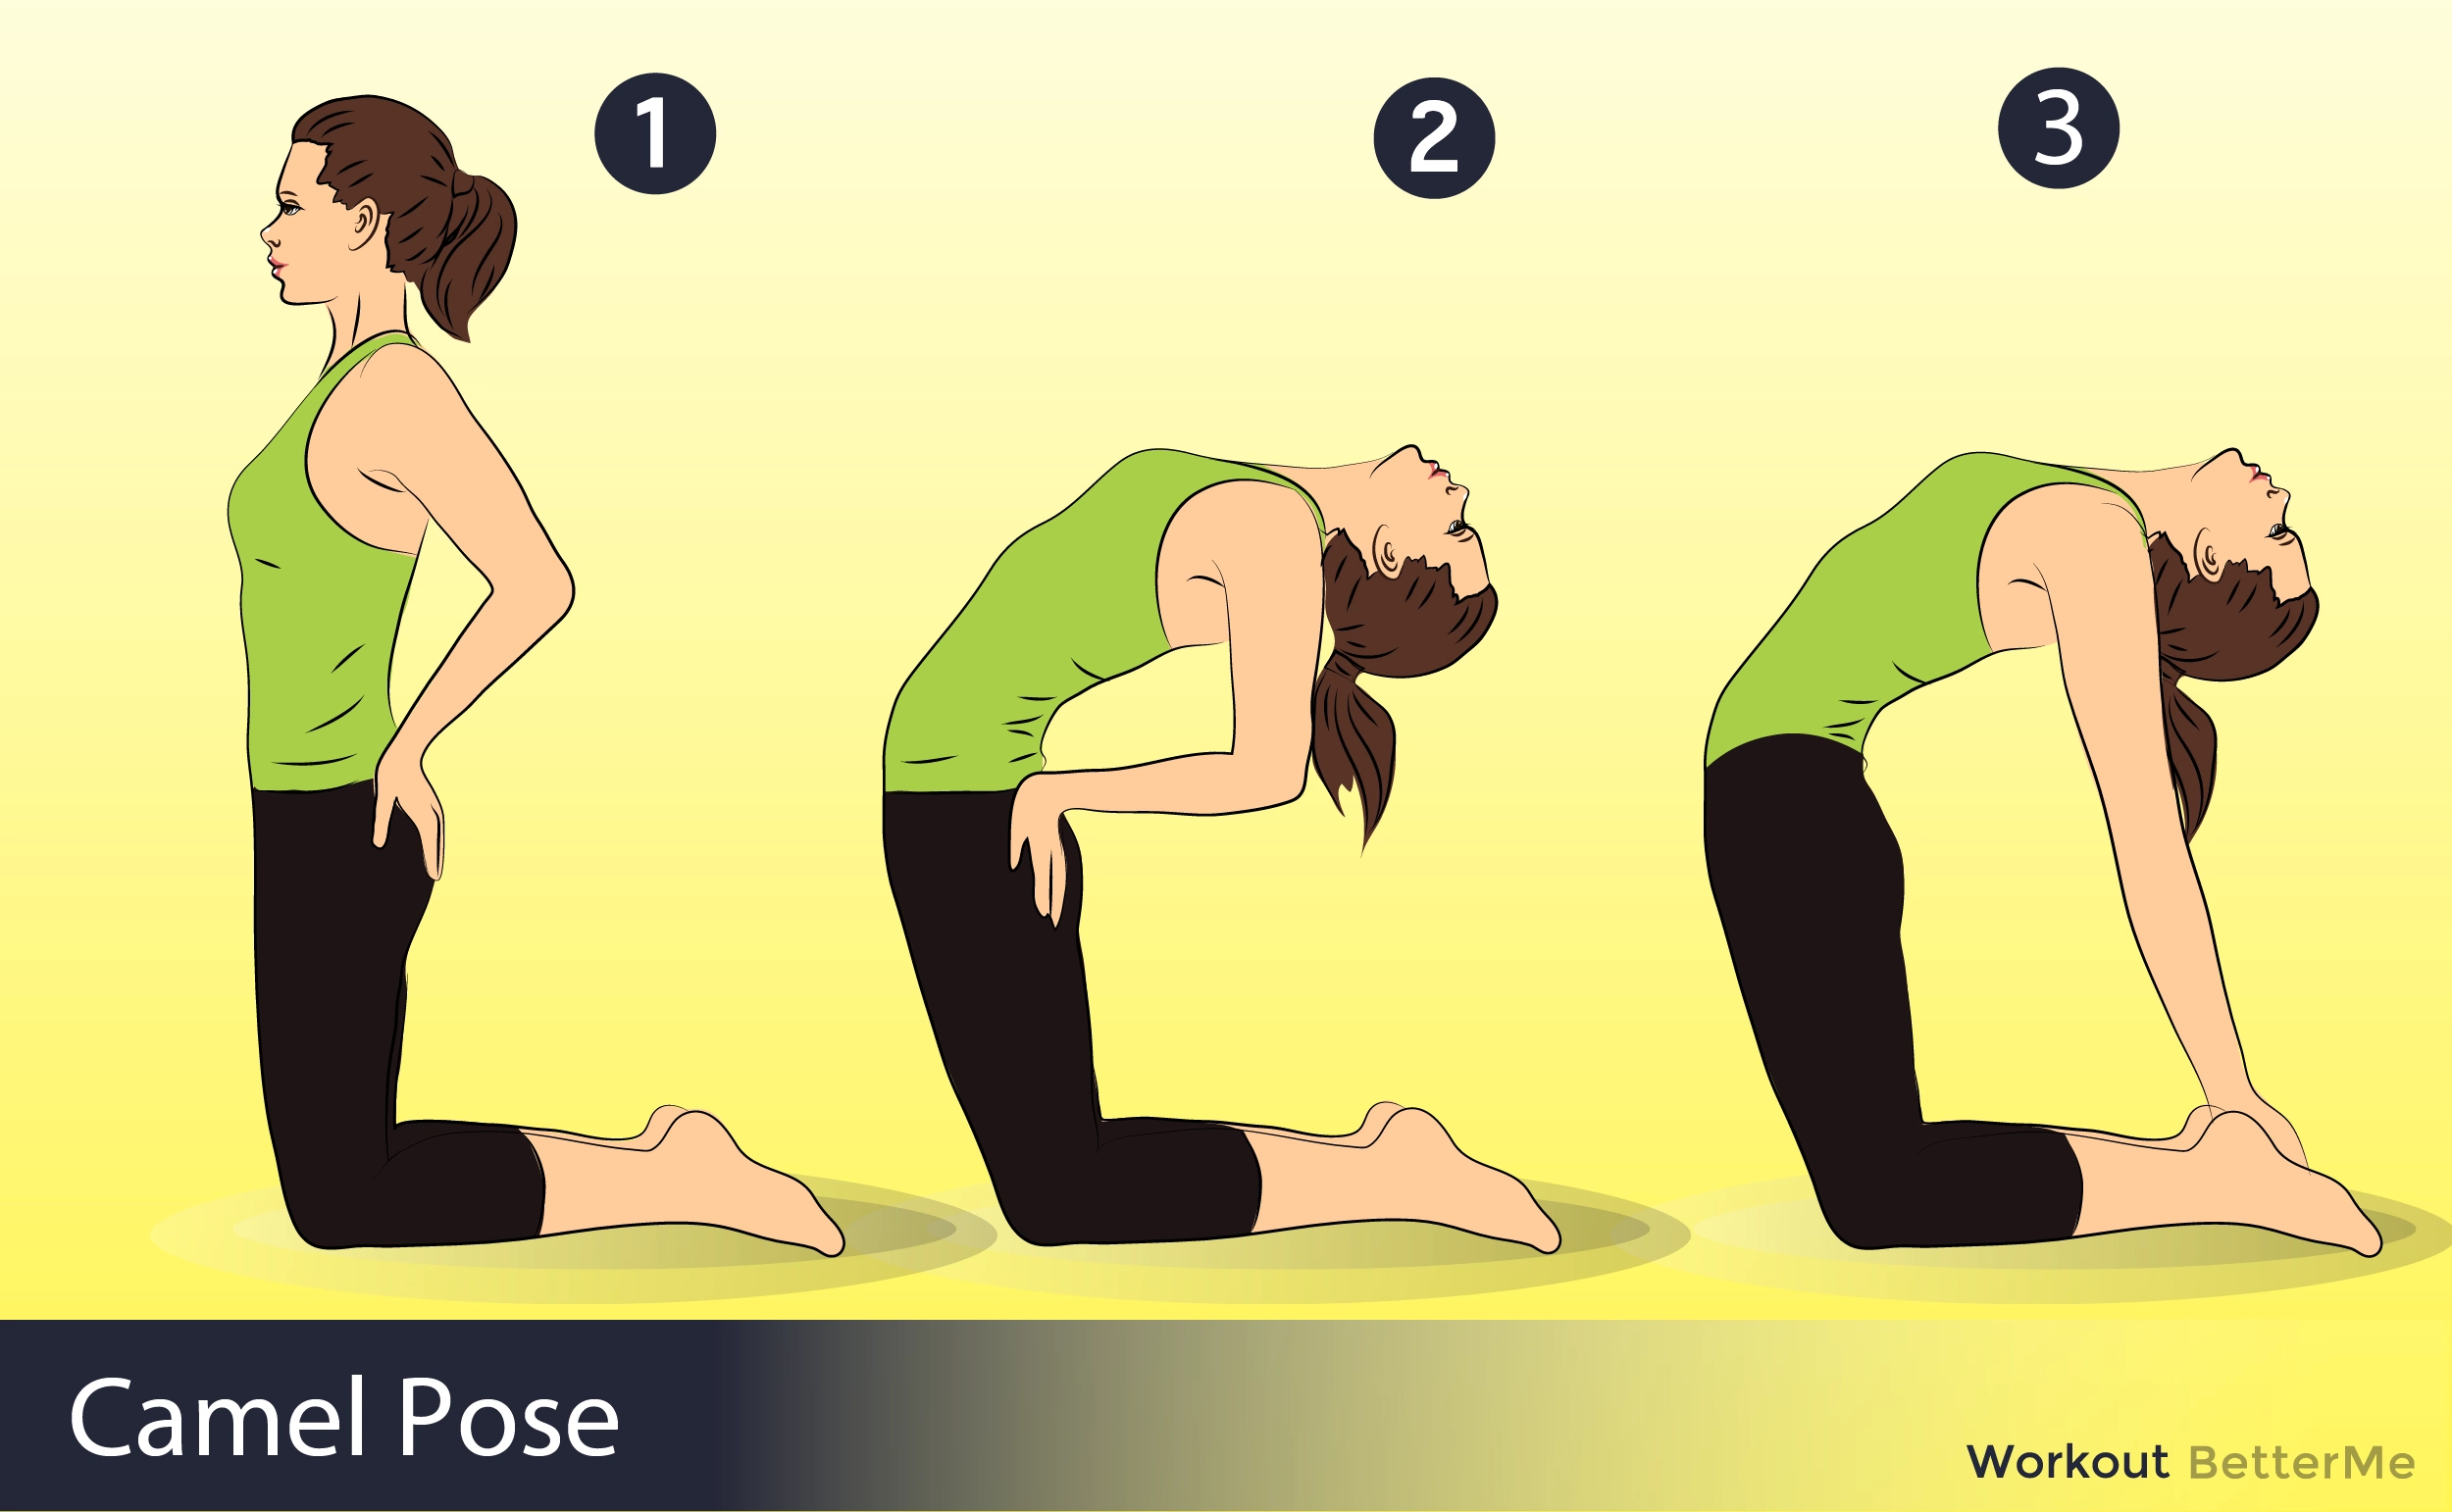
#6. Camel Pose Yoga
Credit: BetterMe
– Kneel on the floor with your knees hip width and thighs perpendicular to the floor. Rotate your thighs inward slightly, narrow your hip points, and firm but don’t harden your buttocks. Imagine that you’re drawing your sitting bones up, into your torso. Keep your outer hips as soft as possible. Press your shins and the tops of your feet firmly into floor.
– Rest your hands on the back of your pelvis, bases of the palms on the tops of the buttocks, fingers pointing down. Use your hands to spread the back pelvis and lengthen it down through your tail bone. Then lightly firm the tail forward, toward the pubis. Make sure though that your front groins don’t “puff” forward. To prevent this, press your front thighs back, countering the forward action of your tail. Inhale and lift your heart by pressing the shoulder blades against your back ribs.
– Now lean back against the firmness of the tail bone and shoulder blades. For the time being keep your head up, chin near the sternum, and your hands on the pelvis. Beginners probably won’t be able to drop straight back into this pose, touching the hands to the feet simultaneously while keeping the thighs perpendicular to the floor.
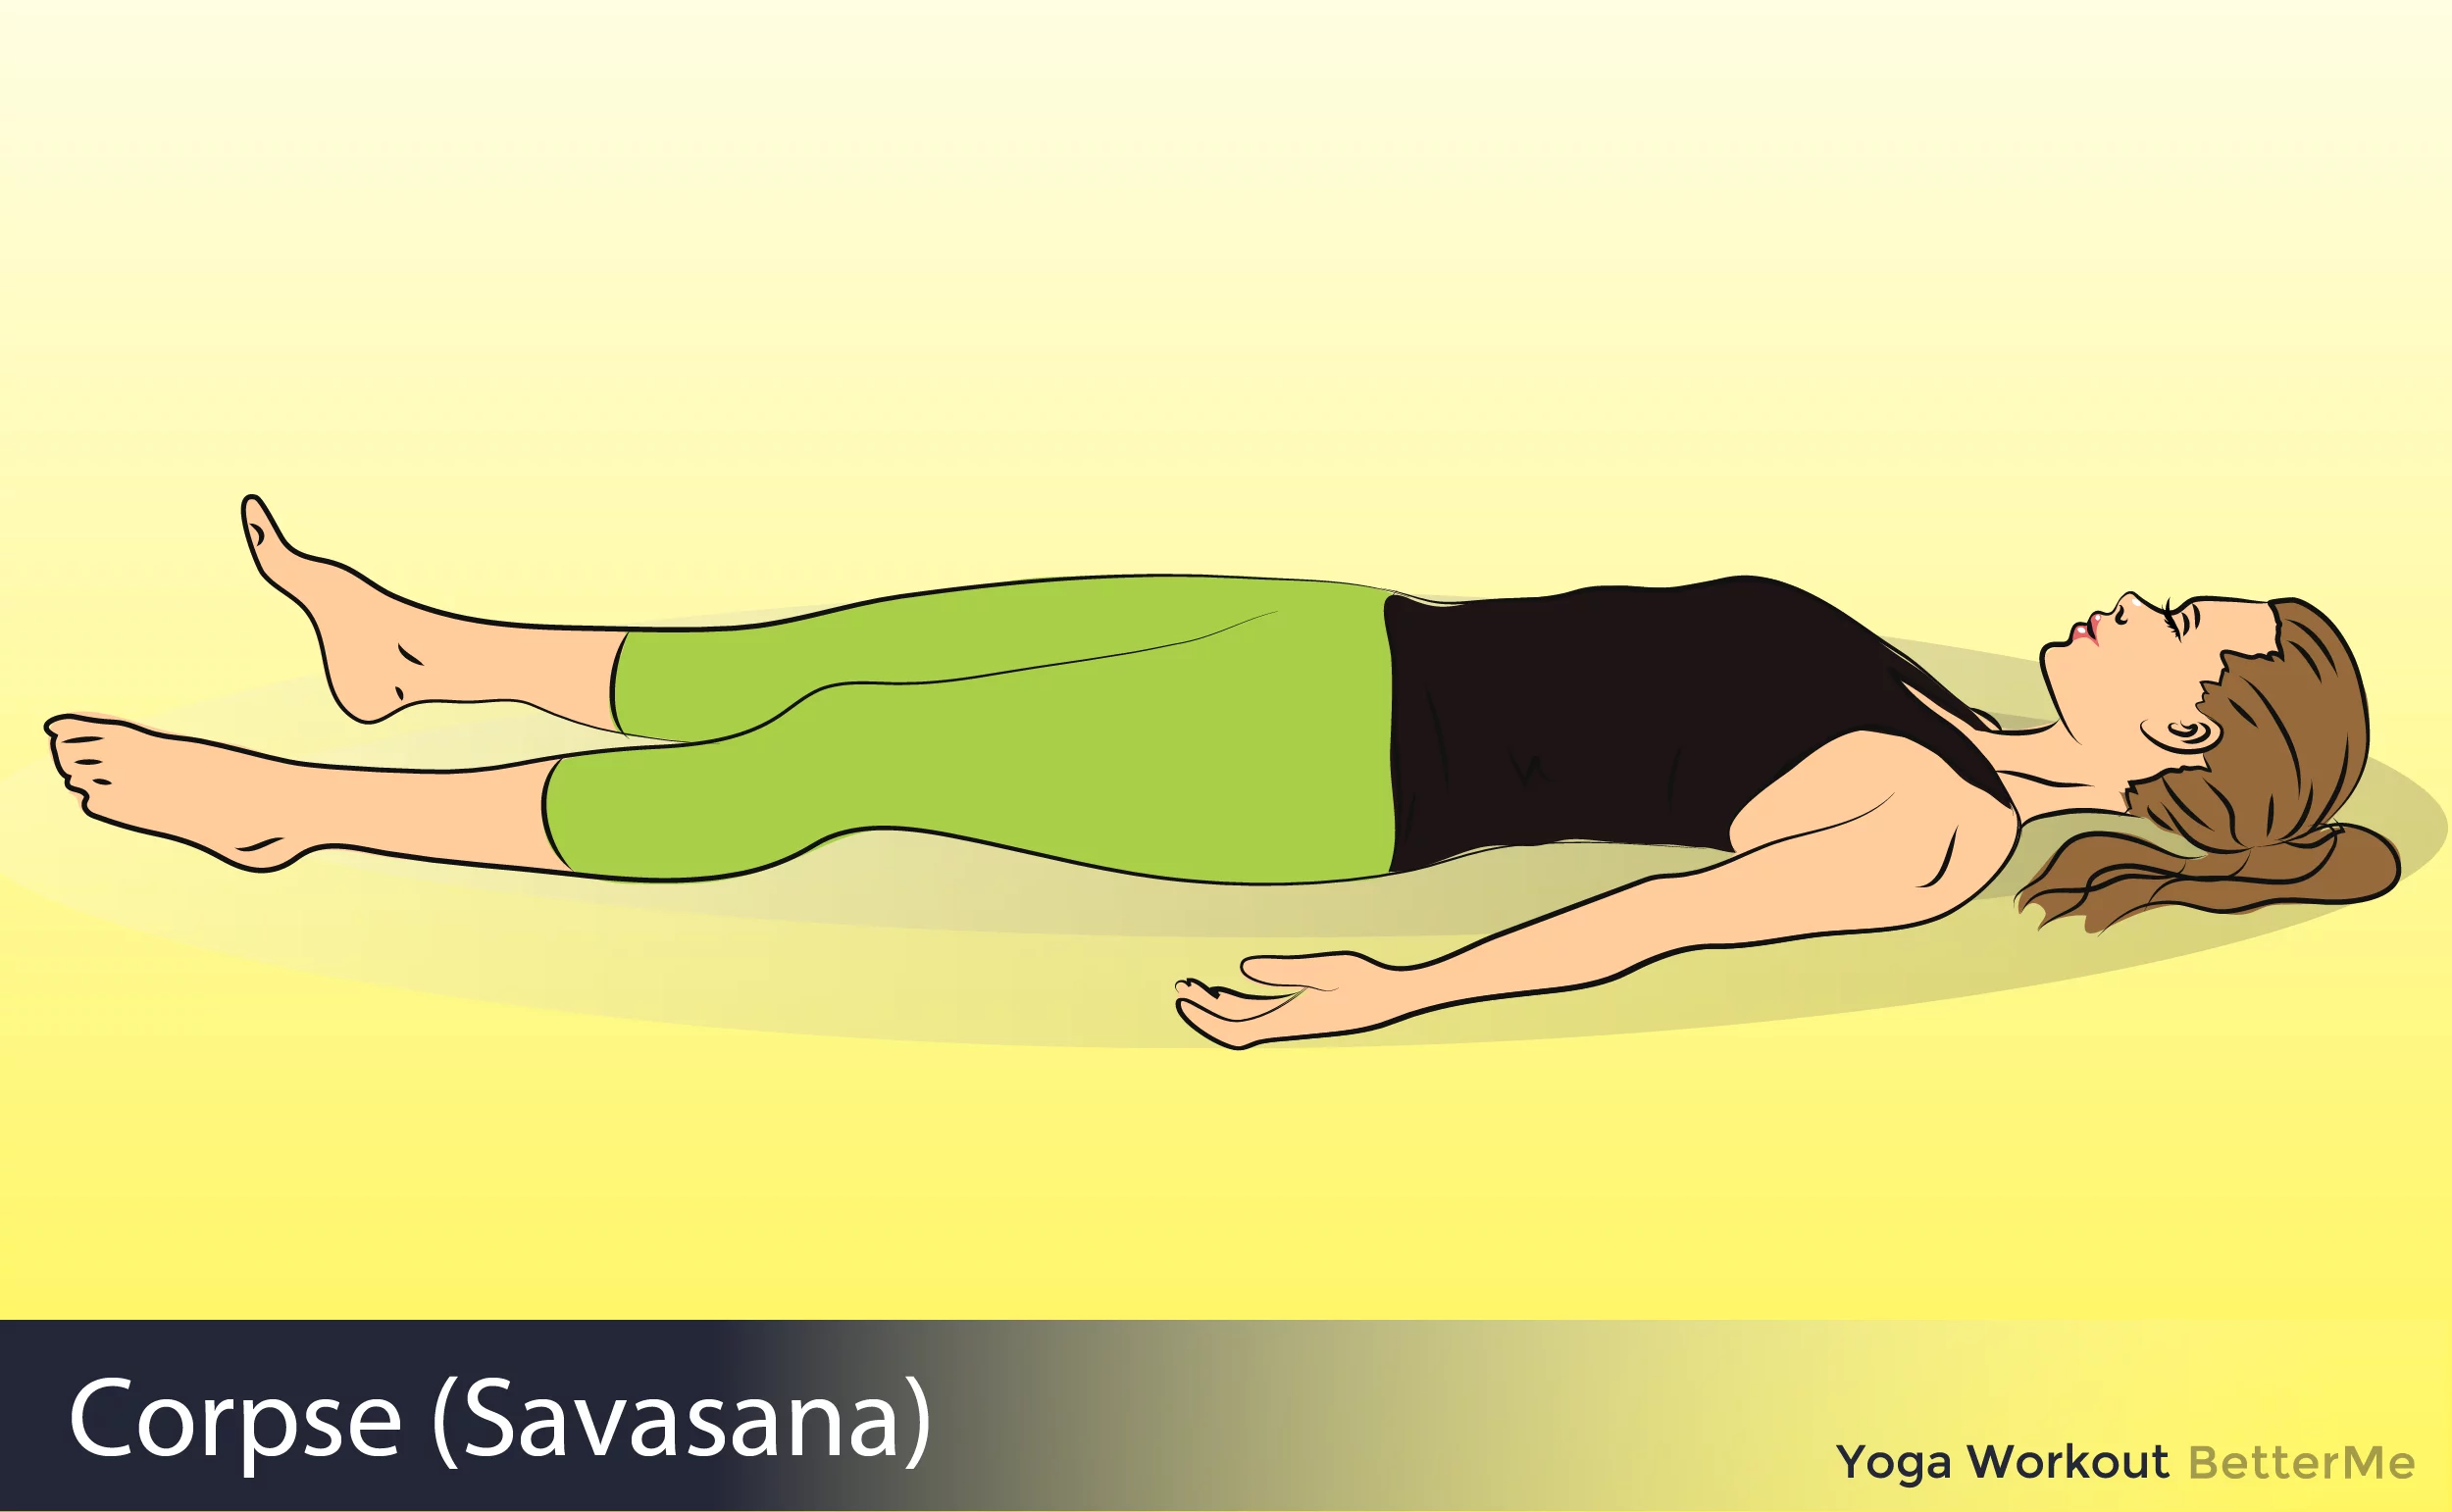
#7. Savasana
Credit: BetterMe
– In Savasana it’s essential that the body be placed in a neutral position.
– Sit on the floor with your knees bent, feet on the floor, and lean back onto your forearms.
– Lift your pelvis slightly off the floor and, with your hands, push the back of the pelvis toward the tailbone, then return the pelvis to the floor. Inhale and slowly extend the right leg, then the left, pushing through the heels.
– Release both legs, softening the groins, and see that the legs are angled evenly relative to the mid-line of the torso, and that the feet turn out equally.
– Narrow the front pelvis and soften (but don’t flatten) the lower back.
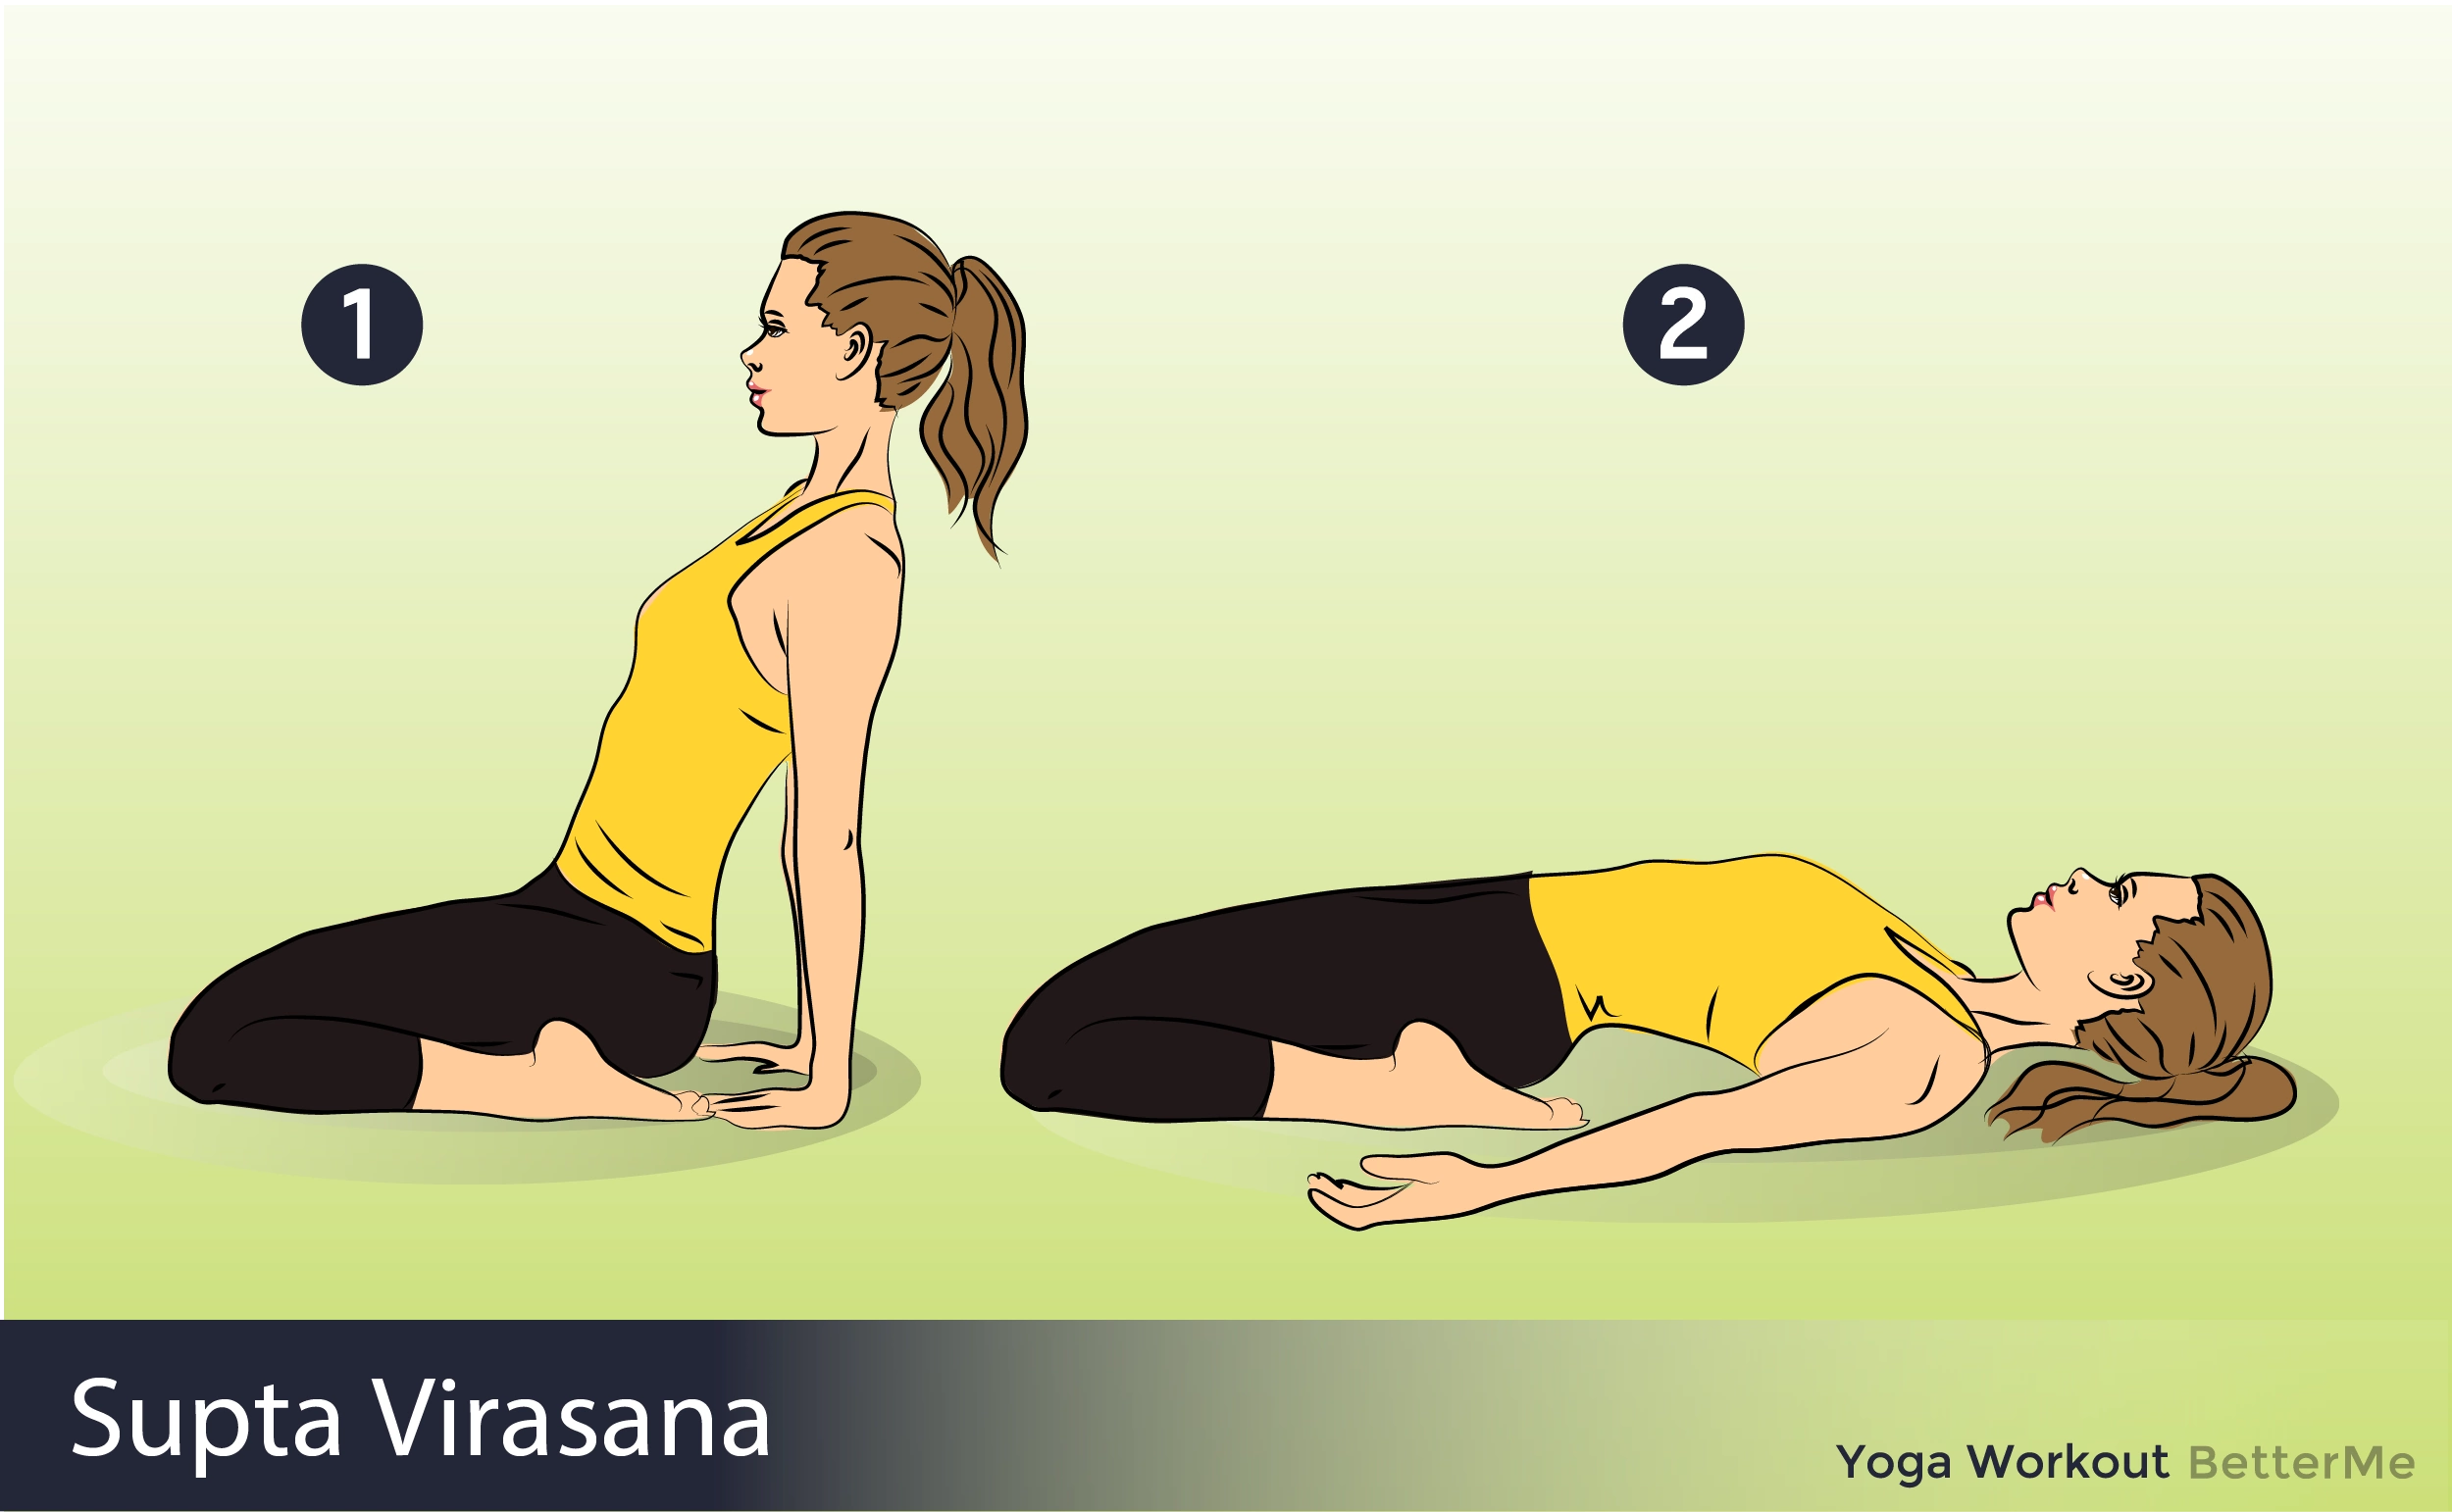
#8. Supta Virasana
Credit: BetterMe
– Perform Virasana. Exhale and lower your back torso toward the floor.
– First lean onto your hands, then your forearms and elbows.
– Once you are on your elbows, place your hands on the back of the pelvis and release your lower back and upper buttocks by spreading the flesh down toward the tailbone.
– Then finish reclining, either onto the floor or a support blanket or bolster.
Help us support and motivate those you love by sharing this article with them and let us know what you think in the comments below.
